Section 1 — Navigate the Hugging Face Ecosystem
In this section we explore what Hugging Face is, how the Hub organizes AI resources around tasks, and how to work with datasets and models using the datasets and transformers libraries.
1.1 What is Hugging Face?
Hugging Face is an open-source ML/AI ecosystem built around three pillars:
- The Hub — open repositories of pre-trained models, ML-ready datasets, and demo Spaces (apps)
- Libraries — Python packages (
datasets,transformers,diffusers, …) for interacting with the Hub - Community — discussion forums, model cards, dataset cards, and collaborative workflows
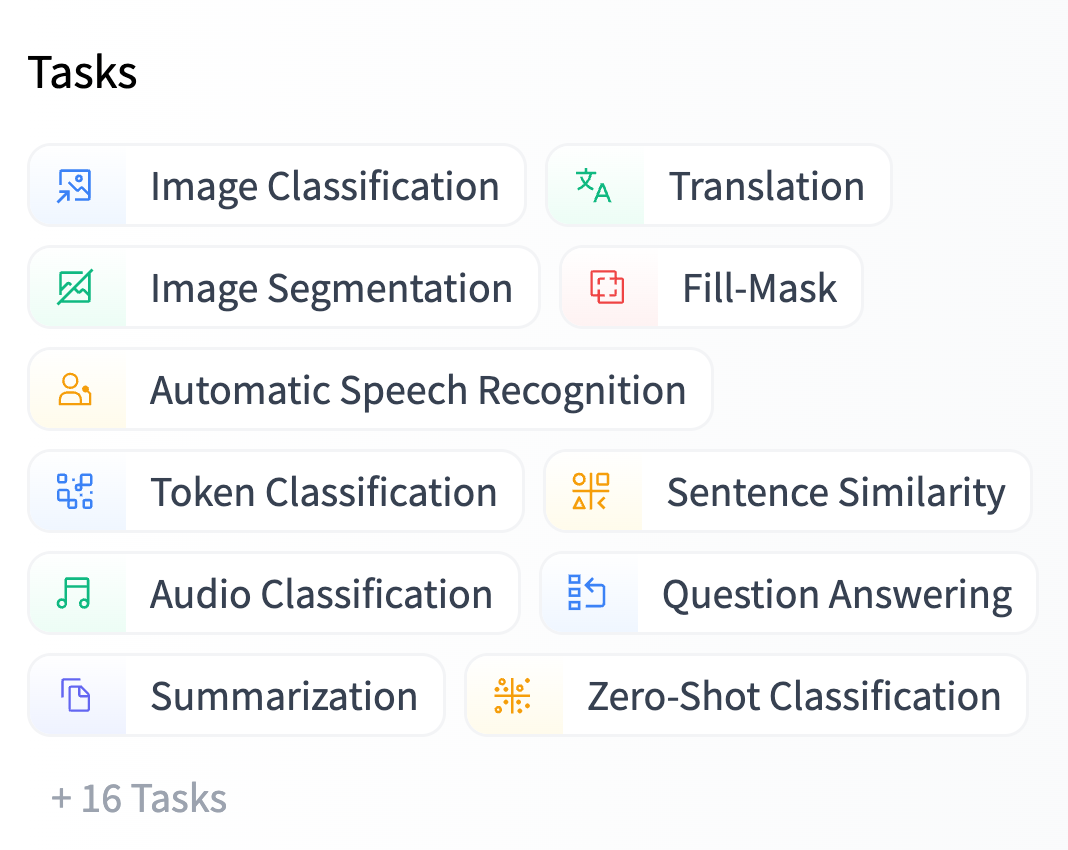
Everything on the Hub is organized by tasks.
What are tasks?
Tasks describe the shape of each model's API — the expected inputs and outputs.
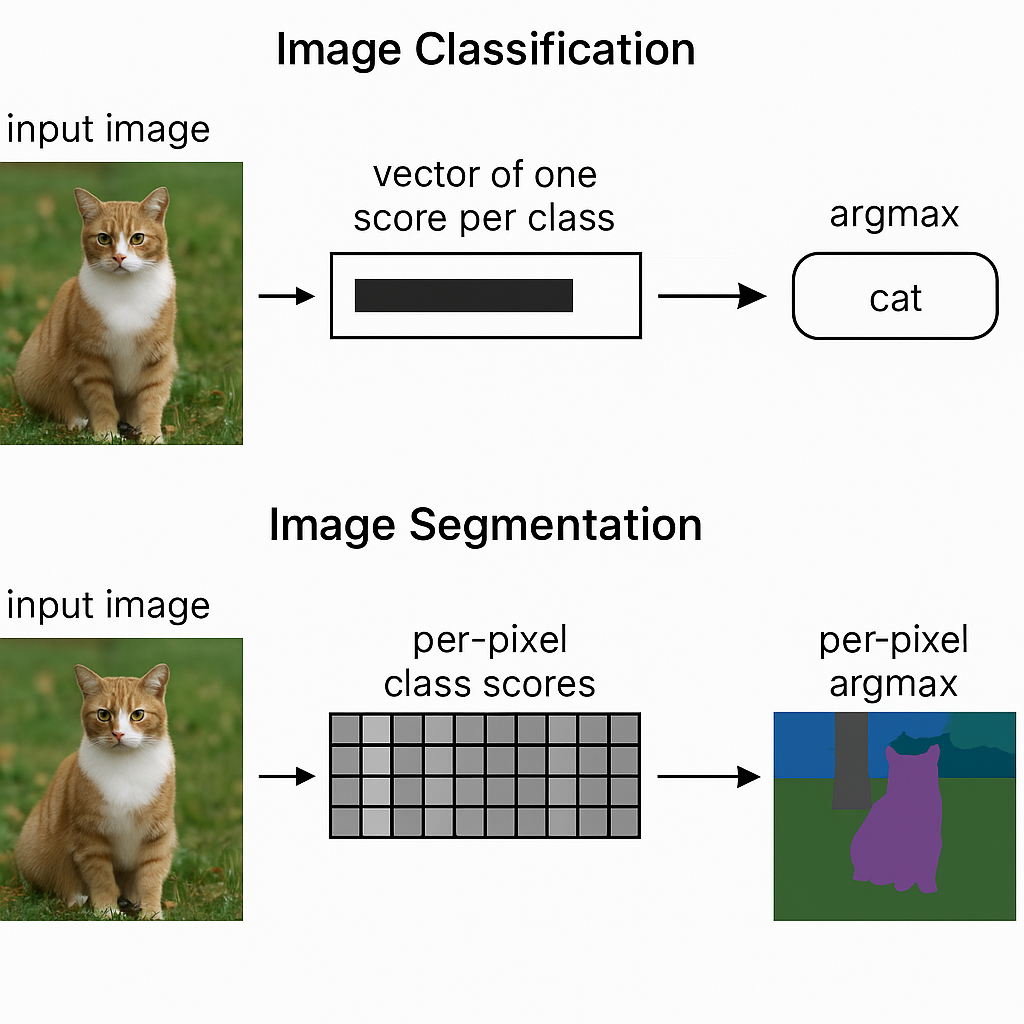
Two image tasks we will work with:
| Task | Input | Output |
|---|---|---|
| Image Classification | Image | Vector of one score per class → argmax = predicted class |
| Image Segmentation | Image | Per-pixel class scores → per-pixel argmax = class masks |
1.2 Working with Datasets on the Hub
The workflow for using any Hugging Face dataset has three steps:
1.2.1 Step 1 — Filter datasets by task
Go to huggingface.co/datasets and filter by your task (e.g. image segmentation). In this workshop we use two versions of the Restor tree cover dataset:
| Dataset | Rows | Description |
|---|---|---|
restor/tcd |
~4,600 | Full tree cover detection dataset (~4 GB) |
restor/tcd-nc |
237 | Small sample for quick experimentation |
1.2.2 Step 2 — Explore data on the Hub
Before writing any code, the Hub lets you explore datasets interactively:
- Dataset card — documentation, licensing, and methodology
- Dataset viewer — preview rows, images, and annotations in the browser
- SQL console — run queries directly over the data splits
Example queries you can run in the SQL console:
SELECT biome_name, annotation FROM test WHERE biome = 1 LIMIT 10SELECT biome_name, COUNT(*) FROM train GROUP BY biome_nameUnderstanding Parquet files
If you look at the dataset files on the Hub, you'll see *.parquet files. Parquet is the standard storage format for Hugging Face datasets:
- Columnar — optimized for querying and processing large datasets
- Fast — blazing fast read/write operations
- Efficient — compressed storage, split into smaller chunks for robust transfers

1.2.3 Step 3 — Use the datasets library
The datasets library is the programmatic way to load, inspect, and process Hugging Face datasets in Python.
Load a small dataset
from datasets import load_dataset

"""
  Load a (small) dataset
"""
dataset = load_dataset("restor/tcd-nc")
A DatasetDict contains one Dataset per split:
print(dataset)
# DatasetDict({
#     train: Dataset({ features: [...], num_rows: 237 })
#     test:  Dataset({ features: [...], num_rows: 35 })
# })
Inspect splits, features, and shape
print("Splits:", list(dataset.keys()))
# Splits: ['train', 'test']

print("Features:", dataset["train"].features)
# Features: {'image_id': Value('int64'), 'image': Image(...), 'annotation': Image(...), ...}

print(dataset["train"].shape)
# (237, 17)datasets library is powered by Apache Arrow, which enables zero-copy reads and memory-mapped access to data on disk.
Pull samples and view images
Image columns are returned as PIL objects. Let's pull one sample from each split:
"""
  Pull one sample from each split
"""
image_train = dataset["train"][1]["image"]
image_test  = dataset["test"][20]["image"]

image_train.resize((512, 512))
image_test.resize((512, 512))When to use streaming=True
For large datasets, use streaming to preview and sample without downloading the entire dataset:
"""
  Stream a (big/large) dataset
"""
iter_dataset = load_dataset("restor/tcd", streaming=True)
print(iter_dataset)
# IterableDatasetDict({
#     train: IterableDataset({ features: [...], num_shards: 7 })
#     test:  IterableDataset({ features: [...], num_shards: 1 })
# })
With streaming, you iterate over samples one at a time:
it = iter(iter_dataset['train'])
sample = next(it)
sample["image"].resize((512, 512))
You can also view the annotation mask:
sample["annotation"].resize((512, 512))streaming=True for large datasets (e.g. restor/tcd at ~4 GB).
Use streaming=False (the default) for small datasets (e.g. restor/tcd-nc at 237 rows).
1.2.4 Discussion
- Find an image classification dataset on the Hub. How is it different from an image segmentation dataset?
- Does the Hugging Face Datasets Hub follow the FAIR principles?
- Findable
- Accessible
- Interoperable
- Reusable
1.3 Working with Models on the Hub
Just like datasets, the workflow for models has three steps.
1.3.1 Step 1 — Filter models by task
Go to huggingface.co/models and filter by task. For image segmentation, we use two models:
| Model | Classes | Description |
|---|---|---|
nvidia/segformer-b0-finetuned-ade-512-512 |
150 | NVIDIA SegFormer fine-tuned on ADE20K (general scene segmentation) |
restor/tcd-segformer-mit-b0 |
2 | SegFormer fine-tuned on the Restor TCD dataset (tree / background) |
1.3.2 Step 2 — Explore on the Hub
Before writing code, explore the model card. Key excerpts from the tcd-segformer-mit-b0 card:
"Fine-tuned from model: SegFormer family"
Understanding Safetensors files
Model weights on the Hub are stored as *.safetensors files. This format is preferred because it is:
- Secure — unlike pickle-based formats (
.bin,.pt), it cannot execute arbitrary code during loading - Efficient — supports zero-copy memory mapping and lazy loading of individual tensors
- Framework-agnostic — stores raw numerical data and metadata without framework-specific code
- Compact — contains only weights and metadata, making it easy to transfer and deploy

1.3.3 Step 3 — Use the transformers library: Manual Inference with Model + Processor
The transformers library provides two key components: models and processors.
Load model and processor
"""
There are two key components in the transformers library: models and processors
"""
from transformers import AutoModelForSemanticSegmentation, AutoImageProcessor

tcd_processor = AutoImageProcessor.from_pretrained(
    "restor/tcd-segformer-mit-b0"
)
tcd_model = AutoModelForSemanticSegmentation.from_pretrained(
    "restor/tcd-segformer-mit-b0"
)Auto* pattern
Classes like AutoModelForSemanticSegmentation and AutoImageProcessor automatically detect the correct model architecture and processor from the Hub repository.
You don't need to know whether the model is SegFormer, DeepLab, or something else — the Auto* classes handle it.
This is the recommended way to load models and processors.
from_pretrained()?
The from_pretrained() method downloads weights and configuration from the Hub (or a local path), initializes the model architecture, and loads the pre-trained weights.
This is the standard pattern across all of transformers.
Process inputs, run inference, post-process
# Process inputs: converts PIL image to model-ready tensors
inputs = tcd_processor(images=image_test, return_tensors="pt")
# Predict masks
import torch
with torch.no_grad():
outputs = tcd_model(**inputs)torch.no_grad()?
During inference we don't need to compute gradients (that's only for training).
Wrapping inference in torch.no_grad() saves memory and speeds up computation.
# Post-process: resize predictions back to original image size
outputs = tcd_processor.post_process_semantic_segmentation(
    outputs, target_sizes=[image_test.size[::-1]]
)[0]
masks = outputs.numpy()
Visualize the results
import matplotlib.pyplot as plt

# Plot input image and predicted segmentation side by side
fig, ax = plt.subplots(1, 2, figsize=(10, 5))
ax[0].imshow(image_test)
ax[0].axis("off")

ax[1].imshow(masks, cmap="tab20")
ax[1].axis("off")

plt.show()
# Overlay the segmentation on the original image
plt.imshow(image_test)
plt.imshow(masks, alpha=0.5, cmap="tab20")
plt.show()Inspect predicted classes
# Get unique class IDs in the predicted mask
unique_ids = torch.unique(outputs)

# Map IDs to human-readable labels
labels = [tcd_model.config.id2label[int(i)] for i in unique_ids]

print("Number of classes:", len(labels))
print("Classes:", labels)
# Number of classes: 2
# Classes: ['__background__', 'tree']
The TCD model was fine-tuned specifically for tree cover detection, so it outputs a clean binary segmentation: tree vs. background.
1.3.4 Discussion
Explore the model card for restor/tcd-segformer-mit-b0 and answer:
- For how long and with how many GPUs were each of the models trained?
- What is the carbon footprint of the training?
1.4 Additional Resources
- datasets library docs Full documentation for the datasets library
- Dataset Viewer docs How the Hub's dataset viewer works
- Datasets on the Hub Overview of how datasets are hosted on the Hub
- Parquet files How parquet storage works on the Hub
- Models on the Hub Overview of how models are hosted on the Hub
- transformers library docs Full documentation for the transformers library
- Safetensors docs Documentation for the safetensors format